Getting Started With VisLab
Looking for help and getting started, tips & trick while working with VisLab? Here’s the right page. In this section you’ll find video tutorials and useful resources on how to use and work with VisionLib’s companion tool. VisLab comes with the VisionLib Tracking engine/SDK aboard. Once you’ve downloaded the tool, you are almost good to go.
Note, that you need a valid license to run and use the tool (this includes valid, time-limited trial licenses). If you want to apply for testing VisLab and your trial License has expired, we can generate a new one for you. In such a case please write to request@visionlib.com.
Getting-Started Resources
For Model Tracking, you need both, a physical object to be tracked, and a 3D model of it as reference for VisionLib.
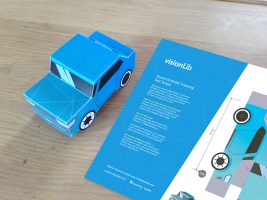
if you don’t want to get started with custom objects, you can use our do-it-yourself test object, which we use throughout all our demos..
Download this and other demo material from our Resources page.
An introduction to visLab
We have created several tutorial videos that get you started using VisLab. Start the video or open the playlist with all video tutorials on Youtube.
You are currently viewing a placeholder content from YouTube. To access the actual content, click the button below. Please note that doing so will share data with third-party providers.
More InformationCalibrate a Camera
Well calibrated device optics are key for Augmented Reality. While VisionLib includes calibration data for major devices, we recommend to calibrate not-included, special or custom hardware, because it deeply improves tracking and superimposition results.
You are currently viewing a placeholder content from YouTube. To access the actual content, click the button below. Please note that doing so will share data with third-party providers.
More InformationKeyboard Shortcuts
Currently not too many, anyway for the sake of completeness.
| Shortcut | Function |
|---|---|
| a | Reset the 3D view by centering the 3D model to its bounding box. |
| CMD/Ctrl-N | New tracker |
| CMD/Ctrl-O | Open existing .vl file from system. |
| CMD/Ctrl-I | Add an image sequence from a path |
| CMD/Ctrl-T | Add an new Target |
| CMD+Shift/Ctrl+Shift-S | Save current file as a new file |
| CMD/Ctrl-S | Save as current file |
| CMD/Ctrl-L | Set license file |
| CMD/Ctrl-Q | Quit application |
